[Leg extension possible from locked position] The newly designed leg locks make adjusting the tripod height smoother than ever. The leg pipes can be extended without unlocking the lock, reducing the number of steps required for setup and significantly improving work efficiency. After placing the tripod on the ground, simply step on the protrusions at the end of the legs and extend them to easily extend them. The built-in 1/4-inch ARRI accessory mount allows for compatibility with a wide range of accessories, ensuring expandability.
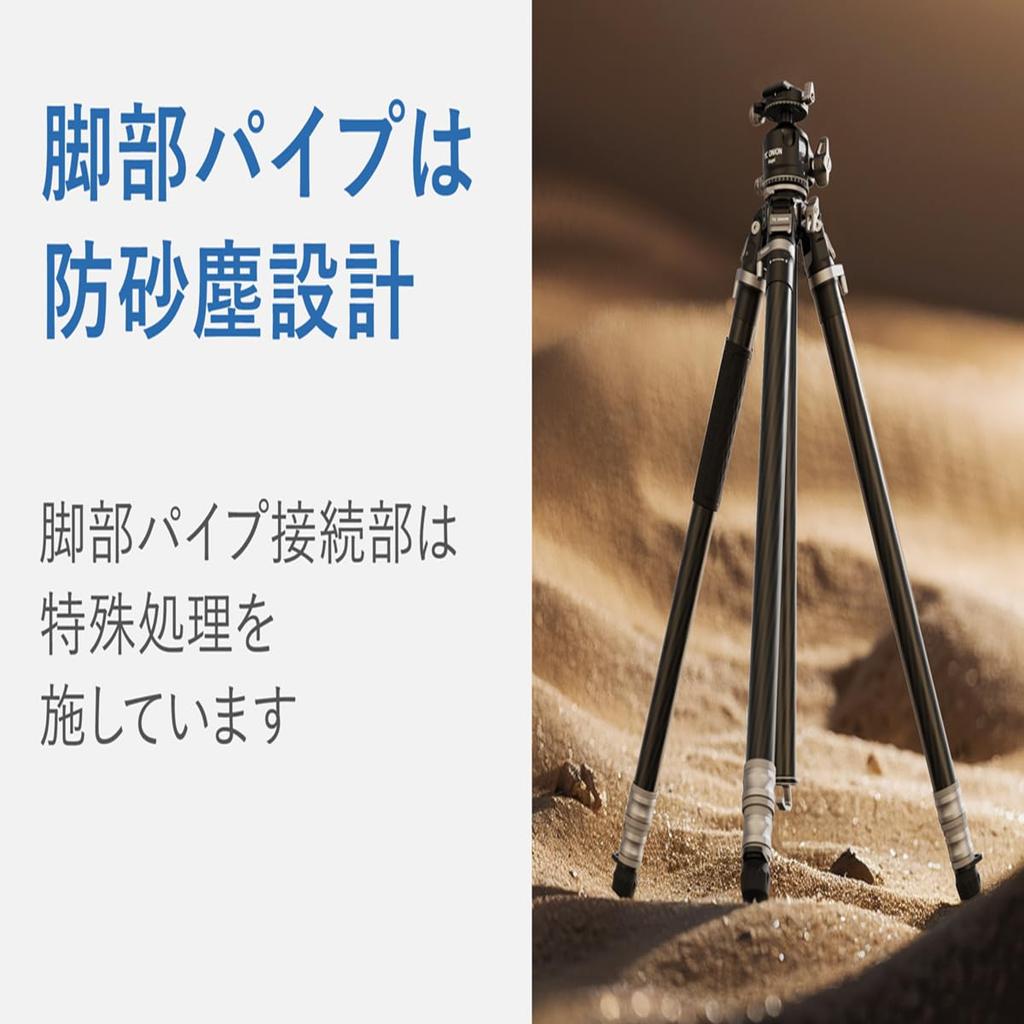
[There is only one leg lock lever at the top of each leg] When storing the legs, simply operate the lock lever at the top of each leg, push the leg down, and then re-lock it. There's no need to bend or stoop, making it easy to use. The pipe connections are specially treated to prevent gravel and other debris from getting inside. It can be used safely even in sandy or rough environments.
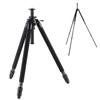
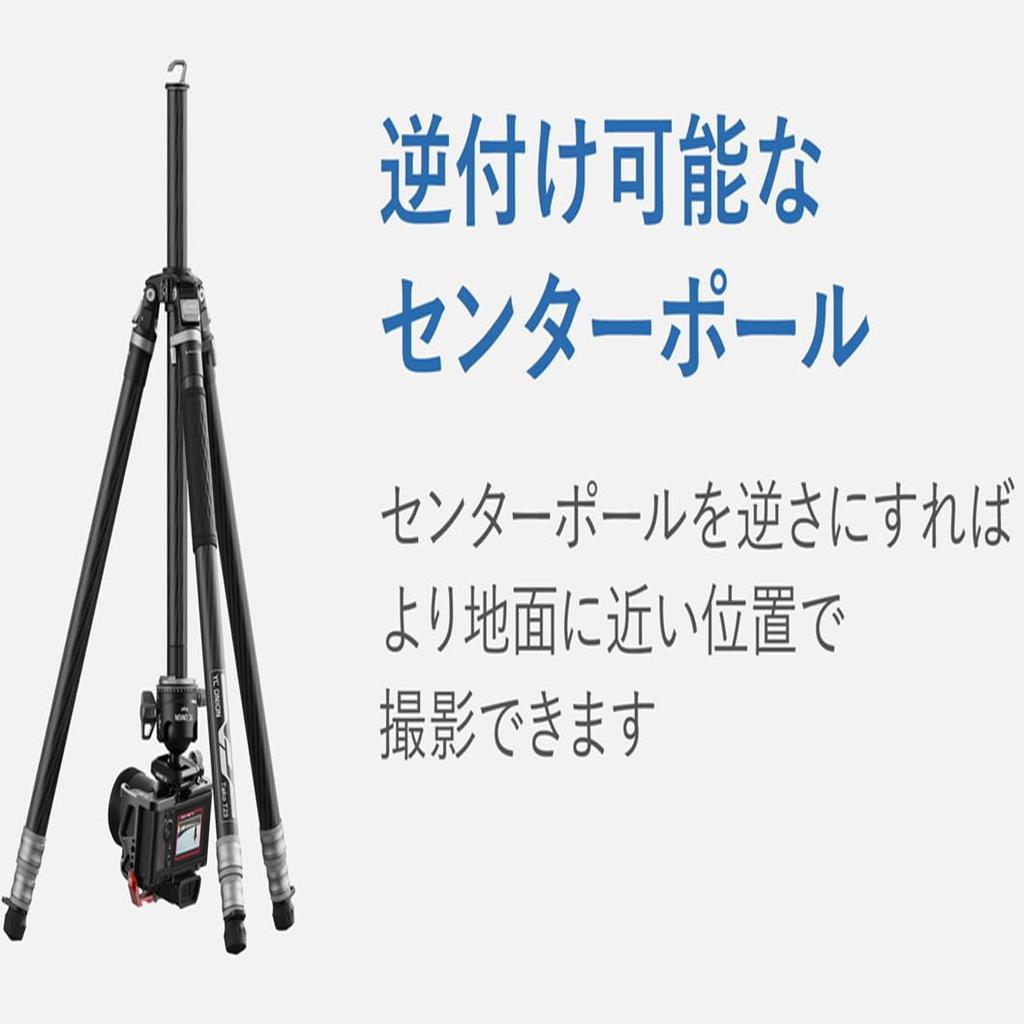
[Reversible Center Pole] By attaching the center pole upside down, you can shoot from closer to the ground or take a bird's-eye view of the bottom of the tripod. [Reverse Mounting Procedure] 1. Rotate and remove the center pole's anti-slip stopper. 2. Remove the center pole from the top and insert it from the bottom in the reverse direction. 3. Securely attach the anti-slip stopper to prevent it from falling. *The center pole has a groove to prevent rotation. Be sure to align it precisely with the protrusion on the tripod. The head mount is equipped with a hydraulic head, allowing for smooth and stable video capture. An optional half-ball type is also available.
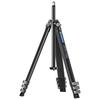
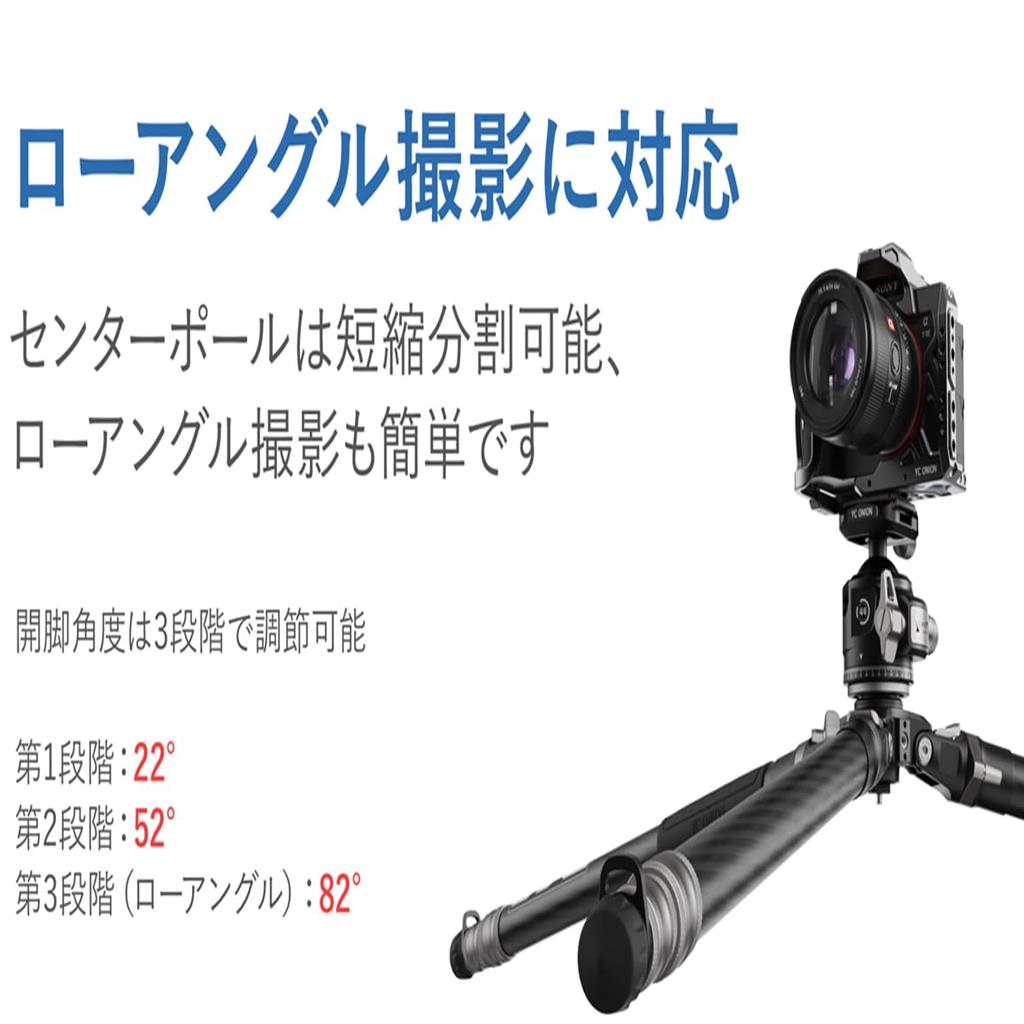
[Also suitable for low-angle shooting] The center pole can be shortened and separated, making low-angle shooting easy. The leg angle can be adjusted to three positions: Position 1: 22°, Position 2: 52°, and Position 3 (low angle): 82°. [To separate the center pole] 1. Remove the tripod head. 2. Turn the anti-slip stopper to remove it. 3. Use the tool included with the stopper to turn the internal screw on the tripod head mounting section and pull up to remove the center pole. 4. Replace the platform, tighten the locking knob, and reattach the tripod head. *Please use a shorter center pole for low-angle shooting.
[Secure Screw to Prevent Head Loosening] After attaching the head, tighten the secure screw to prevent it from loosening during shooting. Instructions: 1. Remove the center pole stopper. 2. Use the included tool to securely tighten the secure screw.
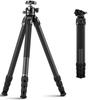
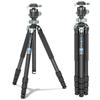
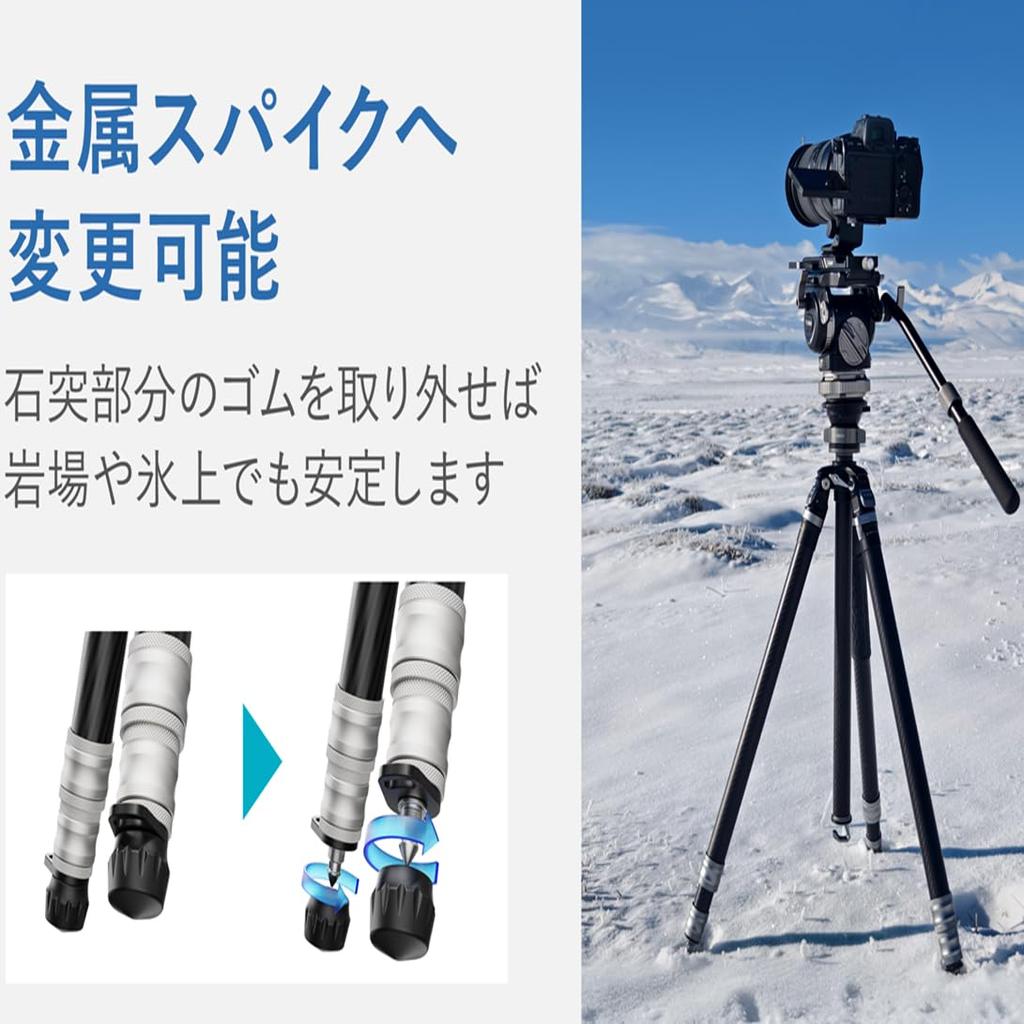
Compact and Lightweight Design: The compact design measures just 72cm long and weighs just 2.4kg when folded, making it easy to fit in a 24-inch suitcase. The one-touch design minimizes bending when adjusting the height, improving operability and safety. This ensures efficient and comfortable operation every time you shoot. Remove the rubber feet to reveal metal spikes, allowing for secure placement even on rocks or ice. Avoid contact with seawater or corrosive liquids, as this may affect performance and product life.
[Center Pole Horizontal Mounting Bracket (for Tako Tripod Series) *Sold Separately] By removing the center pole and attaching this bracket, you can achieve more creative shots, such as bird's-eye views and multi-angle shots. *Horizontal Mounting Instructions: 1. Unlock the knob on the bottom and pull out the center pole. 2. Insert the bracket into the tripod base and tighten the locking knob. 3. Align the groove on the center pole with the protrusion on the base, then adjust the length and secure. Depending on the weight of your camera, we recommend placing a weight on the other side to balance it out.
[Center Pole Extension Accessory Compatible] By adding an additional tripod head, you can easily shoot with two cameras or create multi-angle shots. *To install the extension accessory: 1. Remove the knob on the bottom, align the protrusion with the groove, insert the head, adjust the position, and secure it in place. 2. Attach the load-bearing hook to the bottom of the center pole and check the balance of your equipment before use.
Compatible with the Lichee Arm Head LGH38C: When combined with a ball head, it can also be used as an arm-type head. It offers excellent portability. Installation instructions for the LGH38C: 1. Unlock the head's quick-release plate and secure the bottom plate of the arm to the head clamp. 2. Rotate the arm to a vertical position and release the tilt lock. Adjust the plate's level, then tighten the tilt lock to secure it.


 No-delivery refund